As I mentioned in my earlier post, How to make a cavity mold, I had tons of slip, so I made house bottles. Slip casting is a way to replicate an object in ceramic. It is also great for small scale production and editioning. There are two ways that something can be casted, either solid or hollow. Here are the detailed instructions for hollow slip casting. Directions for solid slip casting are briefly described at the end. And here, below, are my houses waiting to be glazed!

(the ones in the front row are still drying)
Supplies:
slip
container
water or slip dope
spoon, or something to mix with
rubber bands
clay shaping tools
sponge
blow dryer (optional)
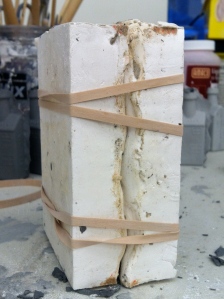
step 1- make sure the inside of your two-piece cavity mold is clean, fit the two pieces together and close it tight with rubber bands.

step 2 – mix your slip to remove any clumps. add water or slip dope to thin your slip so that it is the consistency of half-and-half or heavy cream.
step 3a- pour the slip into the mold. after a few seconds the slip may sink a bit, so add some more.

step 3b- the plaster of your mold will begin to absorb the moisture from the slip, and a wall will start to form (pictured above). when you have achieved your desired width(at least, pour the slip back into the container for later use. for my object I waited about 8 minutes(depending on the size of the object you are casting and the thickness of your slip, you may need to add or subtract to your wait time.)

step 4- wait at least 2 hours to let your slip dry. the longer you wait, the better your object with come out. if you don’t want to wait, you can dry it with a blow dryer. and again, if your object is larger than mine, wait longer.
step 5- gently pry the mold apart. BEFORE removing the object, slice off the excess slip at the top of the object, to easily get an even lip.

step 6- trim the object with trimming tools and/or smooth with a sponge. let dry and underglaze, or bisque fire your objects.
directions for solid slip casting
follow directions above, but skip step 3b. simply fill the mold and let dry. but note that smaller objects, like mine, are ideal for this method because if your object is too large or thick, it will explode in the kiln.
THANKS AGAIN TO ALEX MAC
xxx G